This post is meant to get you up to speed with WebJobs as quickly as possible. It does not however contain every detail about this topic. I've included a few links at the end which contain much more detail.
Overview
A WebJob in the context of an Azure WebApp is a mechanism for running background processes. This can be useful in cases where a user completes a task via the WebApp which requires some processing, but that processing does not need to be carried out immediately. WebJobs are a good fit for any asynchronous task such as reacting to events, processing messages from queues, or performing maintenance work.
Why WebJobs?
Aren't they just glorified console apps? Not really. WebJobs provide several advantages over console apps. Some of these advantages are:
- Logging: just link your Azure Storage account and you'll get a decent logging dashboard in no time.
- Scaling: if your WebJob experiences high load, the AppService underneath it can be configured to AutoScale. No need to manually deploy and manage additional instances of your job to more virtual machines.
- REST API: programmatically control your WebJobs through a REST API. This is much easier than using RDP especially if you want to manage your WebJobs in code.
- WebJobs SDK: the SDK has many out of the box integrations with Azure Storage queues, Blob Storage, ServiceBus queues and topics, and many more. You can of course implement this on your own, but being able to get up and running quickly can be very helpful.
- Scheduling: WebJobs can be scheduled easily using several methods (more on this later)
When not to use WebJobs
If your code has a dependency on specific software that needs to be installed on the host virtual machine, then using WebJobs might not work for you. With WebJobs, you don't have direct control over the virtual machine they run on. Even in this case, I suggest finding Nuget packages that perform the same job instead of depending on other processes to be present on the host virtual machine.
Types of WebJobs
There are 3 types of WebJobs
- Triggered: runs on a schedule
- On Demand: run manually
- Continuous: runs continuously
Continuous WebJobs are a good fit for reacting to events such as processing messages from queues or reacting to file changes in Blob Storage..etc. Triggered and On Demand WebJobs are good for any background processing tasks.
Creating & Deploying WebJobs
A WebJob runs in the context of an Azure WebApp or API App. The WebApp acts as the container for the WebJob. If you have an existing Console App, you can zip and upload it through the Azure portal or deploy it through Visual Studio by right clicking on the project and selecting "Publish as Azure WebJob".
Best practices when creating a new WebJob:
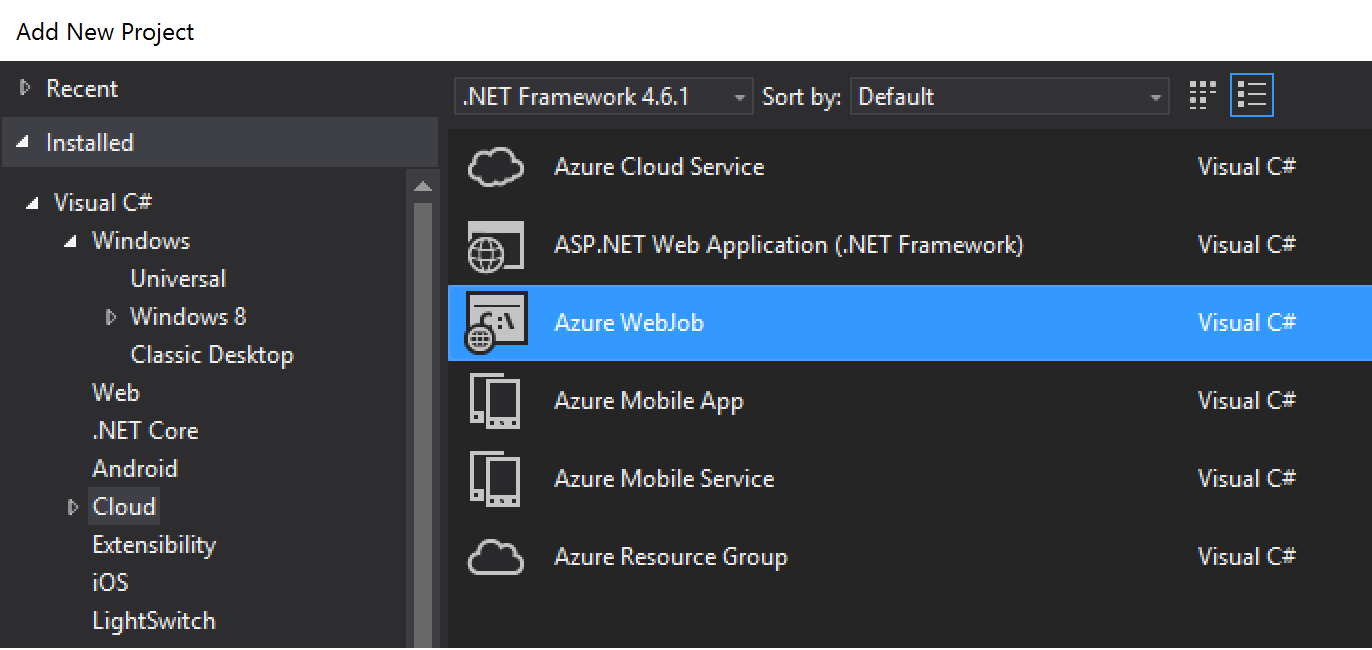
- Add a new project to your solution. You can find the WebJob template under Cloud => Azure WebJob. Note: Make sure you specify the .NET version you want to use. (assuming you're using Visual Studio)
- Update nuget packages as necessary since the template has old verisons.
- If you want to deploy to multiple environments (staging, production..etc), add the SlowCheetah Nuget package (you will need that for transforming app configs).
- Add configuration transforms to your app.config. You can do that by right clicking on your app.config file and selecting the "Add Transform" option. Note: you will need the SlowCheetah Visual Studio extention for this option to be available.
- When you're ready to publish your WebJob, right click on it and choose "Publish as Azure WebJob". A publishing wizard will guide you through to choose the type and schedule of your WebJob.
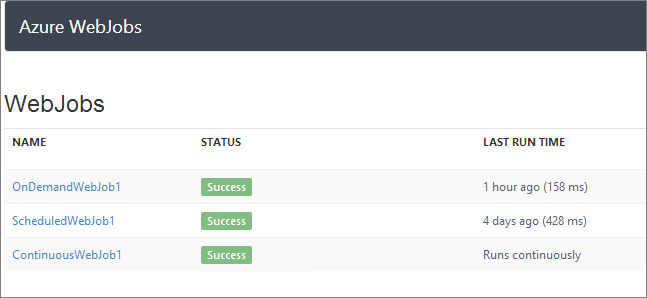
- Once your WebJob is deployed to Azure, you can find it under the WebApp or API App it was deployed to by going to Settings => WebJobs.
Scheduling Options
There are three ways you can schedule your triggered WebJobs
- Azure Scheduler
- CRON timer expressions using the WebJobs SDK Extensions Nuget package
- CRON expression in a settings.job file in the root directory of the WebJob
If you decide to use CRON expressions, make sure the Always On option on the web app is turned on.
Note: if you need scheduling recurrence down to the minute level, you will need to upgrade the Azure Scheduler instance to the Standard tier.
Logs
WebJobs provide a dashboard where you can see all the jobs you have, their running status, and individual invocations along with any output they generate.
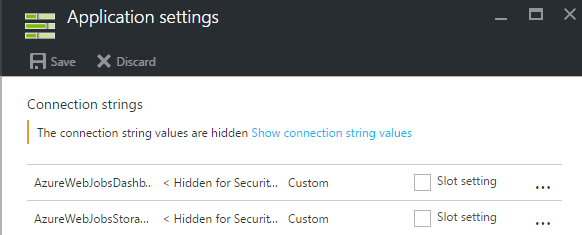
In order to access the logs for a WebJob, an Azure Storage Account needs to be linked with the WebJob. In App.config, there are two connection strings:
<add name="AzureWebJobsDashboard" connectionString="" />
<add name="AzureWebJobsStorage" connectionString="" />
You can populate these with the connection string for your Storage Account using this format:
DefaultEndpointsProtocol=https;AccountName=NAME;AccountKey=KEY
Important: On the WebApp you deployed the WebJob to, go to Settings => Connection strings and set two connection strings with the same names and values you set in your App.config and set their type to "Custom". Once you do that, it will get picked up by convention and you'll be able to view the dashboard.
Tip: for simplicity, I like to use the same Storage Account for both Storage and Dashboard. I found it simple to have a single connection string in my App.config called "Azure Storage" and use that when initializing the WebJob.
var storageConnection = ConfigurationManager.ConnectionStrings["AzureStorage"].ConnectionString;
var config = new JobHostConfiguration(storageConnection);

var host = new JobHost(config);
host.Start();
This way, there is one less connection string to worry about and transform.
Logs Retention
You can control the history size and retention for triggered WebJobs by using the WEBJOBS_HISTORY_SIZE setting (default is 50 invocations). Unfortunately, there isn't a way to control the history size for continuous WebJobs yet. I've opened an issue on the WebJob's GitHub repository for that which will hopefully be included in a future release.
Tips & Tricks
- In the WebJob project under Properties, a webjob-publish-settings.json file is created which holds the configuration details such as the run mode and schedule. You can edit the schedule there or delete the file entirely to get the scheduling dialog in Visual Studio again.
- For continuous WebJobs, the Always On setting needs to be turned on in the WebApp's settings to prevent the WebApp from getting unloaded when idle.
- You can adjust the timeout value that the WebJobs SDK uses to kill idle function invocations (no CPU or IO activity). You can do that by adding an application setting
WEBJOBS_IDLE_TIMEOUTwith a value in seconds in the WebApp's application settings. This setting can be set programmatically as well. - If you want to take a look at the binaries deployed to the Azure WebApp, connect to the WebApp via FTP using a client such as FileZilla, jobs will be under the following directory: site/wwwroot/app_data/jobs
- Enable Development Settings when running locally. This will adjust logging verbosity and other settings in order to optimize for local development. You can do that by:
if (config.IsDevelopment)
{
    config.UseDevelopmentSettings();
}
Note: you'll need to add an environment variable to your machine with a name "AzureWebJobsEnv" and a value of "Development"
WebJobs & AppService AutoScale
Azure AppService (the underlying infrastructure that hosts the WebJob) can AutoScale to handle increasing load automatically (see here for more info). This will result in having multiple instances of you WebJob running. If you want to prevent your WebJob from AutoScaling, include a settings.job file with the following attributes:
{
  "is_singleton" : true
}
Note: make sure you right click on the file, go to properties, and change the "Copy to Output Directory" setting to "Copy Always" so this file gets included when the WebJob gets deployed.
REST API
You can interact with your WebJobs through a REST API. This comes handy when you want to start/stop or adjust the settings of your WebJobs programmatically. A good example of this is a SQL database maintenance WebJob we have that runs weekly to rebuild indexes and update statistics. That WebJob uses this API to stop all WebJobs that write to that database, performs its database maintenance work, then starts the jobs back up.
Note: you'll need to authenticate with the REST API via basic authentication. The username and password are found in the publish profile of the WebApp.
Additional Resources
Azure documentation
Introducing Windows Azure WebJobs - Scott Hansleman's blog post
Azure Websites and WebJobs - Pluralsight course
Sample projects